Showing posts with label business tips. Show all posts

Wednesday, November 5, 2014

9 tips for holiday shopping at craft shows

by Bev Feldman of Linkouture

The holiday season is rapidly approaching. Halloween costumes and candy have quickly been replaced with ornaments and menorahs. Shopping lists are being compiled and presents are being bought and tucked away.

Handmade products make some of the best holiday presents. They are unique and special, and they can often be specified to the recipient’s taste (with enough notice to the artist, of course!) Here are 9 tips to help make your handmade holiday shopping a success.

Gift image by The Patterned Peacock

1. Plan ahead
Time is a sneaky thing. You start out thinking you have months until the holidays, and before you know it’s a week before the holidays and you haven’t started your shopping. If you want a custom handmade piece for your spouse/friend/mom, you want to make sure to give the maker sufficient notice. Contact them early and check what his/her deadline is for custom orders. Even a few weeks before December 24 may not be enough time. 
                                                
2. See where your favorite artists will be selling
Most artists have a list of what upcoming shows they will be at on their websites or Facebook pages. If not, send them a quick e-mail. They will be happy to have your repeat (or first) business, and you can plan accordingly.

3. Check out what artists will be selling at the shows you will be attending
It can be really overwhelming sometimes to walk into a show and see booth after booth of handmade goodies. Where to even begin? If you know you are going to a specific show, check out to see what artists will be there so you have a sense of what to expect and you’re not quite as overwhelmed when you get there. 

Cranberry freshwater pearl and sterling silver gift set by Linkouture
4. Bring a list
Make a list of everyone for whom you want to buy presents and some ideas of what you would like to buy for them. Think about what their interests are, what colors they like. Do they love wearing jewelry? Have they mentioned to you that they broke their favorite mug or that they need a new case for their new computer? 

5. Check for entrance fees and discounts
At some shows you have to pay even before you have even bought anything. Before you go to the event, check online to see if there are any discounts. Some shows have a coupon you can print and bring with you which will save you a few dollars.

Ornaments by Happy Owl Glassworks, photo by Jessica Burko

6. Bring cash
Between entrance fees and snacks, it’s good to have at least $10 in cash on you. Of course, it’s also good to bring more cash to pay for your gifts, and it will help you to budget. Most artists accept credit cards, but we do lose a small percentage of our sales to pay for credit card fees so cash payments are often preferred.

7. Leave your coat in the car
Holiday craft shows can get really crowded and very hot. The last thing you want to do is lug around your giant winter coat. (Plus, you will want to keep your hands free for all those presents you will be buying!) If for some reason you aren't able to, check to see if the show has a coat check. 

8. Go with a friend or trusted shopping partner
Whenever buying gifts for my family members, I always like to check with my husband who can help me to decide if I come across something that I think one of them will like. Admittedly, going to craft fairs isn't his favorite activity, so I have friends that I also like to go with can give me their opinion. 

Teal & black cowl scarf by Loomination

9. If shopping with a gift recipient, find an excuse to sneak away
On several occasions I have had husbands return to my booth after their wives noted that they really liked a piece of my jewelry. It takes the guess work out for them and they don't have to worry about finding a present later. If you are shopping with someone for whom you want to buy a gift and they have shown an interest in something, find an excuse to return to that booth without them. Tell them you have to use the restroom or you have to make a phone call, and return to the maker's booth. Let them know you are on a secret mission, and we will make sure to get that item wrapped and paid for as inconspicuously as possible!

To see what upcoming holidays shows Boston Handmade members will be at, click here

Wednesday, October 22, 2014

Artisan's Asylum from an Artists' Perspective

by Melissa Glick of Melsplace

asylumdoo

As a visual artist, I sometimes feel like a minority at the Artisan's Asylum. This 40K sf. converted envelope factory is home to over 200 members who either work in shops (wood, metal, glass, jewelry) or with new technologies (3D printing, laser cutters, computer controlled routers called shop bots) or on bikes, leather, electronics and much more. The Asylum is a place where you can take a class or develop a business. It is considered an incubator for innovation and entrepreneurs by some.

eccobutterfly

For me it is the place I go almost everyday, were I am surrounded by creative people making things, not un-like a medieval guild. Having access to tools and knowledgeable people makes The Asylum an environment with endless creative possibilities for me, but it can also be overwhelming for someone who has a hard time focusing.

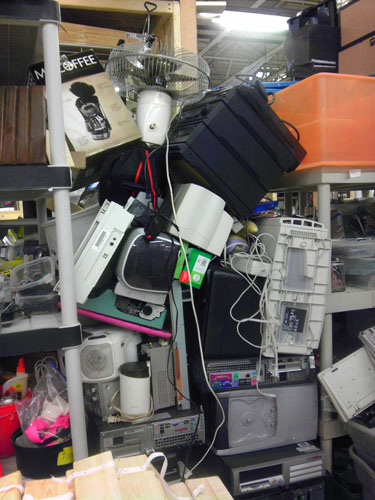
piledhigh

It's thrilling to learn about 3D printing, software programing and electronics, but not having studied physics or computer science, I can feel pretty ignorant. When someone tells me about their project, I need to stop them at the first step because I don't understand how a change in temperature could activate a switch or how playing your recorder attached to a computer can result in notation and sound files you can then use in loops.

JimBopenstudios

I was already working with obsolete technology when I came to The Asylum looking for a work space. Little did I know what a perfect match it would be. The first thing that tipped me off was when successful inventors and PhDs joined me for "take apart sessions. They told me they enjoyed disassembling old computers and that as children this was how they first became interested in what they do now.

takeapartimates

Even though we come from different backgrounds, no one looks at me like I'm crazy when I use old computer parts in assemblages combined with collage. Or when I hung little wooden reclaimed chairs, painted in primary colors from the 50 foot ceiling. Seen here during the construction of the Veladrome, which bikes rode around demonstrating the power of centrifugal force. This is an awesome video of the building of the Veladrome in fast motion and put to music.


chairsdrome

The best thing of all is that these ingenious, talented people are kind and generous with their knowledge. Working out of the Asylum has had a tremendous influence on my work and I am learning new skills all the time. At first, I used gears as a decorative element in my work, then I leaned to use battery powered motors to make them move. Currently, I am converting computer cooling fans to be reversible in a piece that combines purple glass tiles and collage. My next blog will be about the collaborative project, The River of Connectivity, a 6ft x 4 ft Hacker Creation with 8 moving fans controlled by an ardino processor!

Friday, September 26, 2014

Why Handmade: Visit to Prunella’s Workshop

by Lynn Mohney of Prunella’s Workshop

This week marked a historical event in Prunella’s Workshop’s history. We had our first tour, demonstration and lesson. Boston Handmade members joined us on this momentous occasion and managed to convince me it can be done. Not only is it possible, it was a lovely experience.

Our shop space is limited. Our room had to be divided in half to provide an adequate safe place for a toddler to play during the day. While many crafts are possible with a toddler directly under foot, we work with oxy-propane torches. Having a child grab your elbow at an inopportune moment is not a great plan. That said, our space is planned out efficiently to maximize the number of tools available to us.

Jill of Early Bird Designs forming a bracelet

After pleasant conversation over refreshments in the playroom, we adjourned to the studio, where I introduced Boston Handmade to my workspace. I handed each lady a copper bracelet blank, explaining that, while not fully annealed, the blanks were not work hardened. Annealing is the process of heating up the metal so it is soft and pliable. The metal becomes work hardened as we work it with hammers, and if it is worked too much it can become brittle and break. I invited my guests to bend the metal with their bare hands. A common misconception is that metal will not bend as it is cold and hard; as such timid hands will not bend the bracelet. I demonstrated the metal would bend quite easily, and could easily be hammered flat again.

I proceeded to demonstrate the use of the hydraulic press. While the bracelets could be made in their entirety without the press, I wanted to to show this quick and easy process. Yet another eureka moment occurred when they realized the nylon the bracelet was formed into was quite solid. When in action, the pressure of the press squeezes the nylon in such a way it appears almost as soft as jell-o! I did a quick annealing demonstration in which I showed how to add a hammer texture and the process of making the bracelet without the press.

The real fun was to follow! Jill of Early Bird Designs showed us what she had learned by making a bracelet of her own she was able to wear home.  There is nothing like watching someone learn something entirely new. Jill was a great sport, and she made it look really easy. That was when I made my deep dark confession. I too had never made a bracelet using the hydraulic press before, as typically this is my partner’s domain.


All in all, this was an interesting learning experience for me. While I am comfortable with my processes, I had never branched out into teaching prior. I wasn’t entirely certain how it would pan out, but I was confident my Boston Handmade team would be patient with me should my plan not work out as intended. I learned I needed more time! These experiences never play out exactly as I imagine in my head, but I am pleased to say it was fairly close.

Have you ever done a demonstration/lesson in your studio? How would you prepare?

Thursday, September 25, 2014

What's in Your Bag? Craft Show Edition!

by Leanne of Loomination

You've seen it in the fashion magazines: when they unpack everything in a celebrity's handbag and she's got a laundry list of expensive cosmetics, a bottle of Evian, and something really down to earth, like a dog eared paperback or one of her child's favorite toys. No one wants to know what's in my handbag - it's seriously nothing to write home about.

The real question on our minds is what's in your craft show bag? That's where the magic happens!

My Regal Craft Show Bag

I have a large black shoulder bag made by Regal that's full of compartments and pockets where I can store all kinds of stuff. I think this bag, which my mom found at a yard sale, was originally intended to store craftbooking supplies, but it's really perfect for a craft show bag.

The inside!

Here's the very long list of essentials that I keep inside:

Business cards & hang tags
Business cards of stores that carry my work
Postcards for upcoming shows
Mailing list sign up sheet on a mini clipboard

Three card readers (two Square and one PayPal, just in case)
A knuckle buster and carbon sheets (really, really in case)
Coin purse with change
Phone charging battery and wall charger
Pre-moistened lens cloths (great for cleaning your phone screen)

Three ring binder with my sales permits and paperwork

String
Safety pins
Straight pins
Scotch tape
Measuring tape
Lint roller
Scissors - three different size pairs
Pens
Chalk Pen
Stylus
Sharpie

Napkins
Anti-bacterial wipes
Sunscreen

Chalkboard tags
Credit card sign

Handy clear pockets

If you're building a craft show bag, these are some great essentials to consider putting inside. A lot of these items are really particular to my work as a fiber artist, such as the multiple pairs of scissors, the lint roller, and the different kinds of pins.

I carry a million credit card processing options, a phone charging battery, a stylus and special cloths to clean my phone because at my price points most sales (some days all) are made with credit cards.

It seems like I might be carrying too much, but every time I take something out, Murphy's Law kicks in, and that's the one thing I'm going to need at the next show. Last week I had an indoor show and didn't want to bring a ton of stuff, so I took out the most essential essentials to bring with me and left the bag at home. The one thing I really, really ended up needing - string - was something I left behind. Luckily I was able to pull a McGuyver with a strip of fabric, but if I'd had the string, it would have worked out much better.

Lots of storage!

With the busy holiday season it's a great time to get organized, especially if you're a first time exhibitor.

What do you keep in your craft show bag?

Tuesday, September 23, 2014

An Artisan's Day

by Leanne of Loomination

For the past year, I have been working mostly full time as an artisan. Before that, I had a day job and squeezed my studio time into days off that were already jam packed with chores and errands.

I always thought it would be amazing to devote myself completely to my craft and wondered what my days would be like. I spend the vast majority of my time weaving, but there is also a lot of work that goes into the running of a business. I recently finished a business program that really changed the way I work and the structure of my days has changed a lot. We have a live/work studio, so on most days I don’t leave the house, which can sometimes feel a bit claustrophobic.

Studio side of the loft

Here’s a glimpse into my recent (super-glamorous) schedule, so you can see what it’s like for yourself!

Wednesday:

7:30 - rise and shine (yeah, I know, that’s super late, I’m working on it, I swear!)

7:30-9:00 - computer work. (Today it was working on my wholesale line sheet and figuring out a password protected area of my website for wholesale ordering.)

9:00-9:30 - yoga

9:15 - boyfriend leaves for work

9:30-10:30 - breakfast, shower, walk the dog (who has to sniff EVERYTHING)

Recent work in progress!
10:30-2:00 - weaving

2:00-2:15 - lunch break (leftovers - no cooking today!)

2:15-4:00 - more weaving

4:00-4:15 - another dog walk (again with the sniffing)
 
He's cute, though, so it's worth it!
4:15-7:00 - still more weaving

7:00 - boyfriend returns from work

7:00-8:30 - cooking, dinner, Netflixing (currently: Boss)

8:30-11:00 - more computer work while Netflixing (tonight it's this blog post, an email blast, and a ton of emails)

11:00-12:00 - relaxing and reading

A lot of my days look like this, although I don’t always work in the evening. Usually, I do some finishing work (fringe twisting, hand sewing, etc.) on the couch, but most of my finishing work gets done while I'm at shows, so I’ve been doing a lot more work on the computer in the evenings lately.

What I love most is having the flexibility to decide what I want to work on and when. Sometimes you just need to switch gears for a while to get your inspiration back.

Do you work from home? What’s your workday like? 

Thursday, September 18, 2014

Consider doing a Trade Show!

by Diane Ivey of Lady Dye Yarns


Back in May of this year, my company, Lady Dye Yarns attended our first trade show. It was an incredible experience to showcase my yarn on the national stage and to meet so many leading manufactures in the textile business. Now that the trade show is over with, I went from being in 2 stores to now being in 20 stores!

Originally, I was very hesitant to participate in a trade show but received encouragement from another yarn wholesaler in Boston, Knit Collage. The cost of doing a trade show is very expensive and in order to go to The National Needle Arts Association Trade Show, I launched an Indiegogo campaign. I did not get the full amount that I was asking for but I raised enough money to take my team to Indianapolis. Doing a trade show opens up so many doors to opportunities beyond selling my yarn wholesale. The trade show allowed me to:
  • Find new distributors for my raw materials.
  • Understanding the trends happening in the textile community.
  • I was able to meet dozens of knitwear designers from around the world who I have reached out to create knitwear designs for Lady Dye Yarns.
  • I was also able to talk with people about how to successful operate my business. 
I learned many things through this trade show. Had I not taken the risk to go, I am not sure where my business would be today. If you are in the crafting world and are thinking about expanding your business, I highly recommend finding a trade show in your craft to attend.

The great knitwear designer Steve Berg who purchased yarn from Lady Dye Yarns!

Wednesday, September 17, 2014

Very Pinteresting

by Jill J. Burns, Early Bird Designs

Pinterest is my favorite social media platform. I suppose it’s not surprising that as an artist, I would be most interested in a site that is mainly images. As many of you know, Pinterest is a 

virtual bulletin board where you can collect and organize images by creating boards and pinning content for different topics that appeal to you. Now lots (over 17 million) of people use Pinterest for all kinds of reasons – perfect for collecting ideas for that bathroom remodel or planning Grampa’s 80th birthday. You can make that one a community board and family can pin their finds. But for me, and other artists/makers, it is great resource for inspiration, source


images for new work, and keeping current with trends. Having a tidy place for my curated images is super sweet. I still cut out images I find here and there and paste them into my sketchbook.  

Sometime old school still works too.  Boston Handmade has an eclectic group of boards with something for everyone. If you follow the boards any new content will come up on your homepage.


Pinterest as a marketing tool
Did I mention that lots of people use Pinterest? Well businesses have figured out it can be a powerful marketing tool. Artists and makers should get it on that action too. Since many folks 

make boards for projects they are planning, -- weddings, parties, wishlists and gift giving ideas – your
work could end up on someone board, which then gets repined, liked and spread through the virtual world like a wild fire. Pinterest has added a new feature so you can enrich your pins and have images linked to their original source. It makes things convenient for viewers to go directly to your Etsy or website. 

Here is some more info on using Pinterest to its fullest marketing potential from Copyblogger and ArtBizblog.

Pinterest the largest rabbit hole of them all?  
Now we all know that social media turns procrastination into an art form. Since Pinterest is a feast for the eyes, hours can drift by looking at one compelling image that leads to the next, and the next. Not gonna lie, Pinterest is pretty seductive that way. So darn visually mesmerizing. So watch out!

Wednesday, August 27, 2014

Handmaking a Banner or Sign for your Craft Business

by Laurie Lynn of Beryllina

Beryllina's new handmade banner!
I needed a new sign for my booth at craft shows that would clearly describe my work to passersby while enhancing the look of my booth. At a craft show earlier this year, I had the pleasure of having my booth next to fellow Boston Handmade member, Leanne Tremblay of Loomination, who had recently made her own sign for her booth. In addition to being inspired by Leanne's work, I was pleased by the idea that I could have an eco-friendly sign (unlike most banners that are vinyl - very UNeco-friendly), that would also fit the overall vibe of my booth, which includes unbleached cotton tablecloths, dark wood cases, a tree earring display, and purple accents! Though it took a few days to make the banner, I am so glad that I did it.

Here are the materials I used:

  • thick canvas or fabric (5 feet long by approximately 28" wide)
  • 5/8" dowels (quantity 3)
  • duct tape (to attach dowels to achieve correct length)
  • hemp string
  • acrylic craft paint (one 2 ounce bottle)
I also used the following:
  • sewing machine
  • scissors
  • iron
  • pins
  • small saw (for cutting dowels to proper length)
  • pencil
  • computer with design program (I used photoshop)
  • projector
  • ruler
  • paintbrush
Starting with the thick cotton canvas (which I had leftover from the haybale-covers we made for the seating at our wedding!), I determined how far I would need to fold over each side to loosely encase a 5/8" dowel. I ironed and pinned this fold in place, all except for the last eight inches or so on each end.


In this unpinned area, I sewed a buttonhole on each corner (on the fabric that was to be folded over to encase the dowel), so I will be able to easily slip the dowel in and out as needed. This will make it handy for packing and bringing to shows! After sewing the buttonholes, I sewed the hem along the top and bottom, as well as the hem on the sides.

Using dowels to hold the banner are a trick I learned from my mother who is a quilter: a dowel across the top AND bottom will keep the fabric hanging straight and smooth with no weird wrinkles or puckers, and it will help hold it down during windy craft shows! Since the length of the banner was longer than one dowel, I cut the third dowel to make the additional length necessary and duct-taped the cut section on to each full size one. I drilled a hole in each end of both dowels, and inserted and tied a short piece of hemp string. I will attach either hooks or additional string to these loops, depending on how or where I would like to hang it (which may vary from show to show).


Once I had the banner fully sewn, I hung it up on my wall and used a projector to project the image for my banner which I had created in Photoshop. 


Next, I traced the projected image onto the canvas using a pencil with a light touch, and I used a ruler for the straight sections of tracing. I pressed the banner against the wall to trace, which meant that when returning after short rests for my wrists (tracing on a wall is more tiring than you can imagine!), I had to realign the traced sections before beginning to trace again. This ensured that there was no weird misalignment of sections!


Once the entire image had been traced, it was time for the fun part: painting! I was quite nervous about this. Using purple acrylic craft paint on white cotton muslin meant there was no room for mistakes. One drip or mis-brush and it could be ruined! 


Painting was very time consuming, since I proceeded very carefully and cautiously. It was well worth the time though, as I am absolutely over the moon with my finished banner. Handmade, eco-friendly, and perfectly aligned with my business, jewelry, and overall style. Stop by one of my upcoming shows to see my new banner in action!

Friday, August 8, 2014

Why Handmade: Winter Holidays?

by Lynn Mohney of Prunella’s Workshop

It’s 88 degrees outside. The sun is shining bright. The air conditioner is on full blast at home, and I just returned from a trip to the pool from the kids. Shortly, I’ll get to work on jewelry. What is on my mind? Christmas. Chanukkah. Winter Solstice. Kwanzaa. Any others I may have inadvertently missed. The biggest holiday gift giving season of the year.
Irritating? You better believe it.

Spider Pendant #7 - Rust and Mint by Lush Beads

I, like many, complain when retail stores start rolling out Winter Holiday items before Halloween has passed. I don’t want to think about shopping yet. I don’t like leaving things for the last minute, but I do have time. Almost four months, in fact. However, as a jewelry designer, it’s never too early to think about the holidays. In fact, I have to start thinking about them on December 26th. Now that it’s August, I am in full blown holiday mode when I’m working in my studio.

Cosmic Love by McDonald Mixed Media Art

Think about it, though. If you are a small business of one, maybe two people, your merchandise isn't going to create itself. It takes time to create even our simplest designs. In the busiest time of the year we can’t be caught with our pants down with no merchandise to sell. The later we wait the less we can accomplish.

Dewy Grass (8x10 mat) by J. Barrows

Furthermore, we need to be prepared for the shoppers who don’t procrastinate. People begin their shopping in September, and sometimes earlier. This is especially true with unique one of a kind art. One may be able to still buy a blender on December 24th. They might have to travel a little, or go to more than one store if blenders are the hot item, but they know what they are looking for. That’s not necessarily how it works when one is purchasing handmade items. As a shopper, you may not have even thinking about a certain person, when you see the perfect handmade item for them.
This brings me back to where I am. It’s blazing hot, and I have to think about the winter holiday gift giving season. In some ways, this isn't too difficult. A necklace is a necklace whether it is August or December. I need to stock up on them and make certain I have enough variety available. However, I also need to consider if I want to make any holiday specific items. They can be big sellers when people are feeling festive, but once the season is over, any remaining stock is likely to sit around until next year. Also, this brings up the matter of inspiration.

Dragonfly Brooch by Stray Notions

Can you inspire yourself to make little snowmen in August? I’m having trouble too. I want to think of sand between my toes and a suntan on my skin. I want to lay around in lush green grass as I listen to the thunder rolling in. My feet and shoulders are bare, and my boots and coat are safely locked away in the attic for a few more months. The winter doesn't need to rush in.

Public Garden Snow 2- 5x7 Photo Print by Lucie Wicker
How do you prepare for your holiday season? How do you maintain a positive attitude, and not become a Mister Scrooge? I’d love to hear your thoughts.

Thursday, August 7, 2014

Creating QR Code to Gain Followers and Fans

by Shannon McDonald of McDonald Mixed Media


This is my first year having a vendor booth and setting up for shows like the SOWA Open Market and Vintage Bazaar. While I was preparing for these shows I spent a lot of time thinking about how I wanted my booth to look and how I wanted to share my information. Business cards are of course wonderful but I got the idea of the QR code from my coworker and photographer Nick Schietromo. I had seen these little black and white boxes but didn't know what they were used for and how they worked. He explained how easy it was and I thought what a better way to have people directly access my information. You simply scan the code with your smartphone and BOOM they can become a fan or follow you instantly! What is better than that? 

What exactly is a QR Code?

It is a machine-readable code consisting of an array of black and white squares, 
typically used for storing URLs or other information for reading by the camera on a smartphone.

Why use them?

It is an easy way for people to quickly follow you on social media. Once they have the app all they have to do it scan the square and it will bring them directly to your Etsy Store, Facebook Fan Page or Instagram. I created a list that I framed and bring with me to craft shows. 
It is easy for people to scan it and find you. 

STEP ONE
Download a QR Barcode Scanner to your smartphone. There are plenty of FREE options available for download thru Google Play if you are an Android user or Itunes if using an Iphone. 
This way you can test out your cost before displaying them anywhere. 
I simply searched for "QR SCANNER"


STEP TWO

Create the QR codes. I have produced QR codes for my Etsy Store, Facebook, Instagram, Pinterest, Twitter and my website. All you have to do is copy the link into QRstuff.com and the website will create your code for download. You can Google "QR Code Generator" and there are so many options. 


This site allows you to download, print and email your codes. Simply copy and paste the desired link in.  I downloaded the codes so I could place them all in a Word document. 


STEP THREE 
Create your Word document and start to adding the codes. Online I found some open use social media icons which I added. They matched the color scheme in my logo. 


STEP FOUR
Print it out and frame it! 
I bring this with me to every show that I do. People use it! Trust me. 

Friday, July 25, 2014

Why Handmade: What is Your Title?

by Lynn Mohney of Prunella’s Workshop

What do you call yourself? Why? It seems a simple question for some, and for others it can be quite complicated. Are you an artist? Artisan? Craftsman? Designer? How do you define each one? Are there negative connotations to any or all of these for you? When you break it down further to your specific specialty, is your title clear, or do you need to break it down even further?


A lot of emotional weight is carried with terms such as artist, and craftsman. Such terms carry different meanings for people, depending on their personal experience, and it can be difficult to separate emotion from objectivity. The title one person uses for themselves may be unsatisfactory to someone else in the same or similar field. For sake of objectivity, I’ve looked up the definitions of some of these terms in the Merriam Webster Dictionary.


Double Infinity Scarf by Loomination

Artist: a person who creates art : a person who is skilled at drawing, painting, etc.; a skilled performer; a person who is very good at something
Art: something that is created with imagination and skill and that is beautiful or that expresses important ideas or feeling; works created by artists : paintings, sculptures, etc., that are created to be beautiful or to express important ideas or feelings; the methods and skills used for painting, sculpting, drawing, etc.
Artisan: a person who is skilled at making things by hand
Craftsman: a person (especially a man) who makes beautiful objects by hand; a person (especially a man) who is very skilled at doing something
Craft: an activity that involves making something in a skillful way by using your hands; a job or activity that requires special skill
Designer: a person who plans how something new will look and be made; a person who creates and often produces a new product, style, etc.


Handmade wool Felt clutch by Sugin Textiles


Did you find any surprises? I personally was struck by the definitions of craftsman v.s. artisan. I’ve preferred artisan over craft or craftsman, as the latter has taken on a meaning of unskilled creating. Playing with play dough, as opposed to creating ceramic pottery, if you will. There is definitely nothing wrong with the former; I like to do it all of the time, but I don’t have to be good at it to call it a craft.  Yet, by very definition, Craftsman and artisan are almost the exact same thing. In fact, the advantage of using the term artisan over craftsman seems to be the gender neutrality of the word.


Vase by Early Bird Designs

In addition, I noticed the word designer has a more hands off definition. There seems to be more room in the definition to allow someone else to create the product based upon the imagination of someone else; however, the definition leaves room for a designer who creates their own ideas.


I wasn’t surprised to find the definition of art/artist to be be the most ambiguous. Art is a difficult concept to define, in my opinion, as so much of it is based upon emotion. For example, I had an art history professor who felt there was nothing more beautiful than the emotion and expression he saw in a Jackson Pollock painting. My husband has shared with me he sees the work of a sloppy house painter, who dripped paint all over a canvas. In the world of art, both opinions can have validity, as it is based upon emotion as much as skill. One cannot force someone to have an emotion if they aren’t feeling it! However, by being vague, the definition leaves room for any craft to elevate to be considered art based upon the response to the work, and the ability of the artisan.


However, we don’t typically introduce ourselves as an artist or a craftsperson. There is a lack of specificity to the terms which doesn’t help our patrons. We say we are photographers or painters. We are mixed media artists. It isn’t always even that simple. For example, if you sew, are you a seamstress? Or do you call yourself a sewer? Maybe you are a tailor or a sewist. One member of Boston Handmade has mentioned she doesn’t like sewer because of the word’s resemblance to a gutter in spelling. She likes seamstress, and feels it reclaims woman’s work of the past in a positive way; whereas another member objects to seamstress due to the suggested hierarchy of seamstress to tailor, the latter being a male higher position in the economic scale. Meanwhile just what is a fiber artist or a textile artist, specifically?


My own field has many titles with slightly different nuances to each. There are jewelry artists, jewelry designers, metal designers, metalsmiths, beaders, and wire wrappers, just to name a few. Within my own house we have different titles. My husband refers to himself as a metalsmith, whereas I usually call myself a jewelry designer/metalsmith.


Why does any of this even matter, anyway? We can say what really matters is the quality of the execution of our work, and this is true. However, how we define ourselves can make a lasting impression on our patrons and other artists/artisans. Each person we come into contact with has a perception of what each of these titles mean, and this perception can be the difference regarding whether they take us and our work seriously. If you are finding people aren’t understanding what you do, or the depth of the skill required to do what you do, consider changing up how you define yourself. You may be pleasantly surprised!

So. What do you call yourself now?
Related Posts Plugin for WordPress, Blogger...